How to Cut and Shape Cast Acrylic Sheets for Your DIY Projects
In recent years, the popularity of DIY projects has surged, with more enthusiasts turning to innovative materials to bring their creative visions to life. Among these materials, cast acrylic sheets have emerged as a favored choice due to their versatility, durability, and aesthetic appeal. According to a report by the Global Acrylic Sheets Market Analysis, the demand for cast acrylic sheets in various applications is projected to grow significantly, driven by the increasing interest in self-made home decor, functional designs, and artistic expressions.
Industry expert Dr. Emily Carter, a leading authority on polymer materials, emphasizes the importance of understanding the properties of cast acrylic sheets for successful project execution. She states, “Mastering the techniques for cutting and shaping cast acrylic sheets can unlock endless possibilities for DIY enthusiasts, allowing them to create stunning pieces with ease.” This insight underscores the necessity of acquiring the right skills and tools for effectively working with this material. As more individuals embark on their DIY journeys, knowledge about the correct methods for handling cast acrylic sheets becomes invaluable, ensuring that creativity knows no bounds.

Understanding Cast Acrylic Sheets and Their Uses in DIY Projects
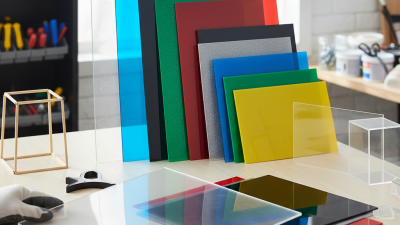
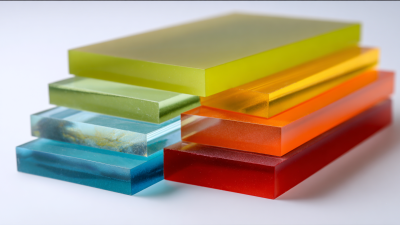
Cast acrylic sheets, known for their clarity and versatility, are an ideal material for a variety of DIY projects. These sheets are lightweight, shatter-resistant, and can be easily shaped and formed, making them popular among hobbyists and professionals alike. Unlike extruded acrylic, cast acrylic is made by pouring the liquid material into a mold, resulting in a denser and more durable product with superior optical clarity. This makes cast acrylic sheets perfect for applications such as displays, signs, light fixtures, and decorative items.
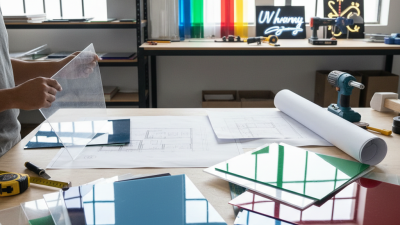
In DIY projects, the versatility of cast acrylic allows creators to experiment with different designs and techniques. The sheets can be easily cut, drilled, and polished, enabling intricate shapes and smooth finishes. When planning a project, it's important to consider the thickness and color of the acrylic, as these factors can influence both aesthetics and functionality. With the right tools, such as a circular saw or laser cutter, and proper techniques, transforming cast acrylic sheets into functional or ornamental pieces can be achieved, providing endless opportunities for creativity and customization.
Usage of Cast Acrylic Sheets in DIY Projects
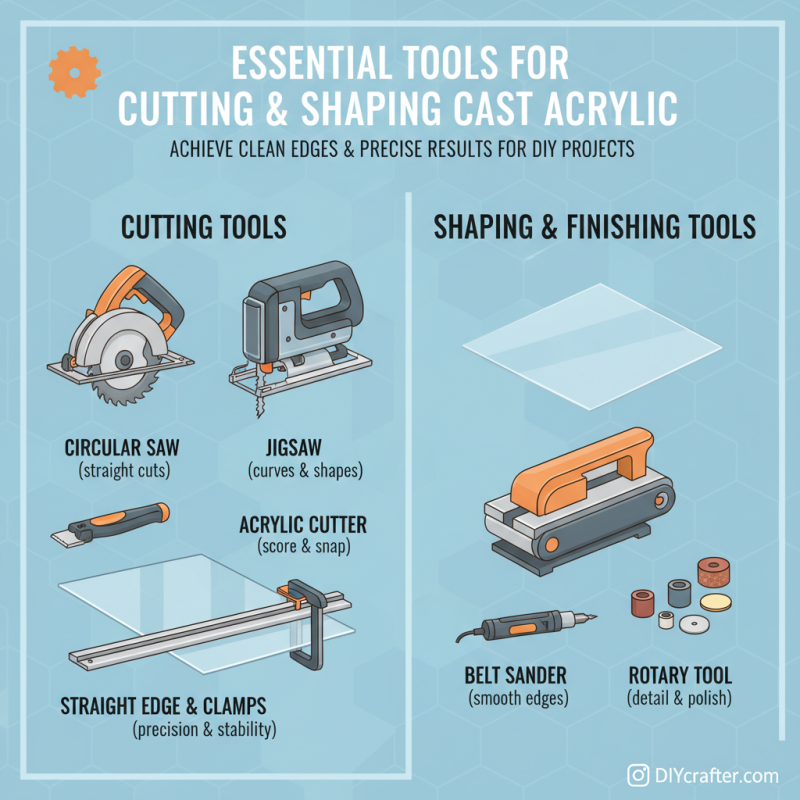
Essential Tools for Cutting and Shaping Cast Acrylic Sheets
When cutting and shaping cast acrylic sheets for your DIY projects, having the right tools is essential for achieving clean edges and precise results. Some of the most important tools you will need include a circular saw, jigsaw, or specialized acrylic cutter for cutting the acrylic sheet. A straight edge or guide will help ensure straight cuts, while clamps can stabilize the material during the cutting process. For shaping the edges, a belt sander or rotary tool equipped with sanding attachments will be effective in smoothing rough edges and creating curves.
Tips: Always wear protective eyewear and a dust mask when working with acrylic to safeguard against small particles produced during cutting and sanding. Ensuring the sheet is properly secured and well-ventilated will enhance your safety and work efficiency. Additionally, consider using fine-toothed blades designed for plastic to minimize cracking and ensure a smooth finish.
Once your pieces are cut, tools like a heat gun can be used for bending acrylic sheets, allowing for more creative shapes in your projects. Lastly, remember to clean the edges with a deburring tool or flame polishing to achieve that glass-like appearance that acrylic is known for, enhancing the final look of your creations.
Step-by-Step Guide to Cutting Cast Acrylic Safely and Accurately
Cutting and shaping cast acrylic sheets can be a rewarding DIY project when approached with the right techniques. Accurate cuts are crucial for ensuring that your pieces fit together seamlessly in your design. To start, gather the necessary tools such as a straight-edge, utility knife, and a fine-toothed saw or jigsaw for larger pieces. Mark your cutting line clearly to maintain precision. When using a saw, it’s essential to maintain a steady speed and steady pressure for a clean cut, avoiding any jagged edges that may affect the final appearance.
**Tips:** Always wear safety goggles to protect your eyes from acrylic shavings and ensure that you are in a well-ventilated area to avoid inhaling any dust. If you’re working on intricate shapes, consider using a band saw for more flexible cuts. For straight lines, a circular saw with a fine-toothed blade will provide smooth edges. Use clamps to secure the acrylic sheet on your work surface; this prevents movement during cutting and enhances accuracy.
Once you have cut your acrylic sheets, shaping them is the next step. You can use a heat gun to slightly soften the edges, allowing for easier sanding and smoothing. Sanding should be done with a fine-grit sandpaper, keeping the surface cool to avoid melting the acrylic. Take your time to refine the edges, as this will make a substantial difference in the overall look of your finished project.
Techniques for Shaping Cast Acrylic: Heating and Bending Methods
When working with cast acrylic sheets for DIY projects, understanding the various techniques for shaping materials is essential for achieving the desired results. One of the most popular methods for shaping cast acrylic is through heating and bending. According to a report by the Acrylic Association, heating acrylic sheets to temperatures between 160°F (71°C) and 190°F (88°C) allows them to become pliable without compromising structural integrity. This softening process makes it easier to bend and form the sheets into intricate designs and custom shapes.
The heating process can be achieved through various techniques, including the use of heat guns, ovens, or specialized bending machines. It's crucial to maintain an even distribution of heat to avoid warping or uneven bending of the acrylic. Research indicates that a temperature gradient can cause stress in the material. Therefore, a uniform heating approach—often achieved by using a temperature-controlled oven—ensures that the acrylic retains its clarity and strength in the final product. Once shaped, the acrylic can be cooled gradually to lock in the desired form.
In addition to bending, techniques like vacuum forming or using jigs can help achieve more complex shapes. When employing these methods, it's important to consider the thickness of the acrylic sheet, as thicker sheets may require longer heating times. Studies show that as the thickness of acrylic increases, the heating time must be adjusted accordingly to ensure effective shaping while minimizing the risk of damage. By mastering these heating and bending techniques, DIY enthusiasts can unlock the full potential of cast acrylic in their projects.
How to Cut and Shape Cast Acrylic Sheets for Your DIY Projects
| Technique |
Description |
Tools Required |
Safety Precautions |
| Cutting |
Using a saw or laser cutter to achieve desired shapes. |
Table saw, jigsaw, or laser cutter. |
Wear safety goggles and a mask to avoid inhaling dust. |
| Bending |
Applying heat to soften the acrylic for bending. |
Heat gun or oven. |
Ensure proper ventilation and avoid skin contact with heated surfaces. |
| Drilling |
Creating holes for mounting or assembly. |
Drill and drill bits suited for plastic. |
Wear goggles and clamp the acrylic to prevent movement. |
| Sanding |
Smooth edges and surfaces after cutting. |
Sandpaper or power sander. |
Use a dust mask and ensure a well-ventilated workspace. |
| Joining |
Using adhesives or mechanical fasteners to assemble parts. |
Acrylic cement, screws, or brackets. |
Follow manufacturer's instructions for adhesives and protect skin. |
Finishing Touches: Polishing and Edging Cast Acrylic for a Professional Look
Polishing and edging cast acrylic sheets is an essential step to enhance the aesthetic appeal and professionalism of your DIY projects. To achieve a smooth, shiny finish, you can start by using fine-grit sandpaper, gradually working your way up to higher grits. Begin with 400-grit sandpaper to eliminate any rough edges or scratches, and then proceed to 800-grit or even finer. This methodical approach ensures that the surface gets progressively smoother, allowing for an optimal polishing stage.
Once you've sanded the edges, it's time to polish the acrylic to achieve that crystal-clear appearance. A polishing compound specifically designed for acrylic works wonders; simply apply a small amount to a soft, lint-free cloth and buff the edges in circular motions. This process removes any remaining scratches and adds shine, giving your project a professional finish. For the best results, consider using a polishing wheel attached to a drill for larger surfaces. Finally, always remember to wipe down the acrylic with a clean cloth to remove any dust or compound residue before admiring your work.