Posts
How to Cut Cast Acrylic Sheets Safely?
Cutting cast acrylic sheets safely requires more than choosing a sharp blade. The material looks glass-like, yet it behaves differently under pressure, heat, and vibration. A rushed cut can create chips, cloudy edges, or a sudden crack across the panel. Small mistakes become expensive quickly.
A reliable process begins with accurate measurement and firm support. Mark the protective film, not the exposed surface, whenever possible. Use a fine-tooth blade designed for plastics, and keep the sheet fully supported near the cutting line. Wear safety glasses, secure loose clothing, and control dust with suitable ventilation. Never force the blade. Let steady tool movement produce the cut.
Temperature also matters. Excessive friction can soften the edge and leave melted ridges. A slower feed may help, but stopping repeatedly can create uneven marks. This is where practical judgment matters. Manufacturer instructions should guide the exact blade type, speed, and thickness limits, because one setting will not suit every panel or saw.
Test on scrap first.
That simple step is often skipped. It should not be.
Even experienced users can misjudge how quickly acrylic reacts to a new blade. Inspect the sheet for internal stress, protect the workbench, and keep both hands away from the cutting path. This guide explains how to prepare, cut, finish, and inspect cast acrylic sheets with greater control. The goal is not merely a clean edge, but a safer, repeatable method that reduces waste and surprises.
Safety Gear and Workspace Setup for Cutting Cast Acrylic
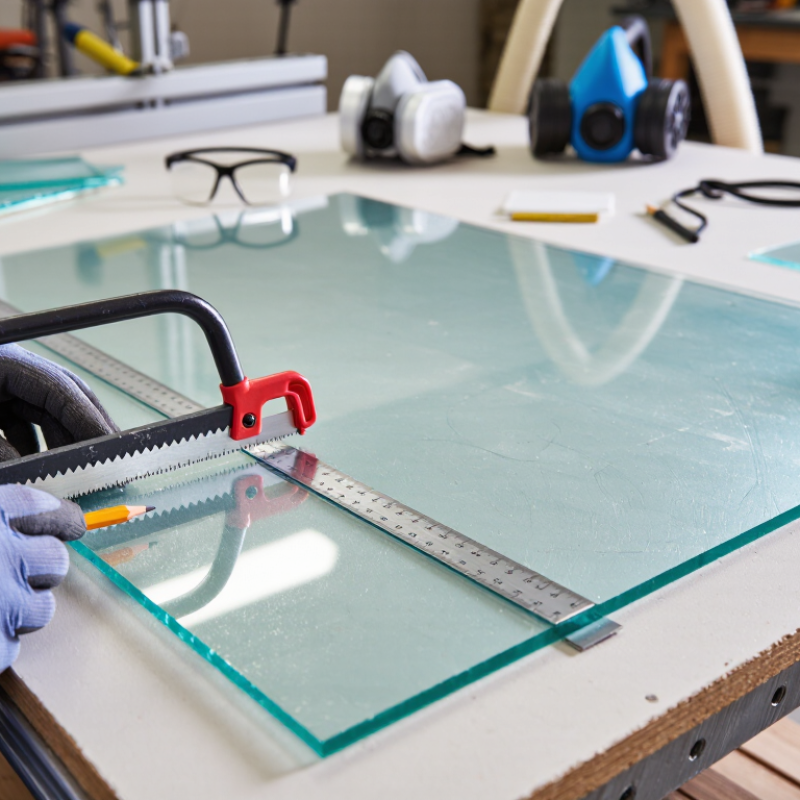
Cutting cast acrylic safely starts before the blade touches the sheet. I use impact-rated safety glasses, hearing protection, and a suitable dust mask. Gloves need care. Loose fabric can catch on moving tools. I choose close-fitting, cut-resistant gloves when handling sharp edges, not when feeding material near a blade. Keep sleeves secured. Tie back long hair.
The workspace should be bright, dry, and uncluttered. I place the sheet on a flat sacrificial board with full support underneath. Unsupported acrylic can flex, vibrate, or crack during cutting. Clamps hold the work firmly, but they should not crush the plastic. Mark the cut line with a fine marker, then check the measurement twice. A vacuum system can collect chips, while cross-ventilation reduces lingering dust. Do not rely on ventilation alone. Acrylic dust still deserves respect. Keep the power cord away from the cutting path, and leave a clear route to the switch.
Before cutting, inspect the blade and tool for damage. A sharp, suitable blade usually produces less heat and cleaner edges. I make a slow test cut on scrap material first. It reveals problems I might miss on the finished panel. My setup is not always perfect; once, poor support caused a small edge chip. That mistake changed my routine. Now I stop when the sheet shifts, the cut smells unusually strong, or the tool begins to bind.
Choosing the Right Tools for Clean Acrylic Cuts
How to Cut Cast Acrylic Sheets Safely?
Choosing the right tools makes cast acrylic cutting cleaner and more predictable. I have found that a fine-tooth blade works better than a rough wood-cutting blade. Use a circular saw or jigsaw with a sharp, carbide-tipped blade designed for plastics. A dull blade creates heat, melting, and cloudy edges. Keep the protective film on both surfaces while cutting. It reduces scratches and helps mark the cut line clearly.
For thin sheets, a scoring knife can produce a controlled straight break. Score the same line several times, then place the sheet over a firm edge and apply steady pressure. Never force the material suddenly. Cast acrylic can crack when it is cold, stressed, or poorly supported. Clamp the sheet near the cutting path, but avoid excessive pressure. I sometimes leave a slightly wider allowance and trim the edge later. It takes longer, but it can prevent an expensive mistake.
Tips: Wear safety glasses and keep fingers away from the blade. Support both sides of the sheet to reduce vibration. Let the tool move slowly without pushing hard. If the edge begins melting, pause and check the blade, speed, and airflow. A test cut on scrap material is worth the few extra minutes. Inspect the finished edge for small chips before removing the protective film. Some cuts still need light sanding, even with careful preparation.
Measuring, Marking, and Supporting the Acrylic Sheet
How to Cut Cast Acrylic Sheets Safely?
Accurate measuring is the first safeguard when cutting cast acrylic. Place the sheet on a clean, level surface, keeping its protective film attached. Measure from the same reference edge each time. A steel ruler helps prevent small shifts. Mark the cutting path with a fine-tip marker or a sharp pencil. For visible cuts, apply masking tape first, then mark on the tape. This makes the line easier to see and reduces surface scratching.
Measure twice. Then check the angle.
Remember the blade’s kerf, or cutting width, when planning the final size. A line that looks correct may still produce a panel that is slightly narrow. I once focused on the measurement and overlooked the blade position. That small mistake changed the fit. Cast acrylic can also chip when pressure concentrates near an unsupported edge. Support the entire sheet with a flat board or closely spaced supports. Keep the waste section supported until the cut is complete.
Use padded clamps to prevent movement, but do not tighten them excessively. Hard clamp edges can leave dents or stress marks. Keep the sheet flat, and avoid letting a long section hang heavily over the table. Before cutting, inspect the marked path for dust, crossed lines, or accidental scratches. Wear eye protection and control dust with suitable ventilation. A careful setup may feel slow, but it usually prevents a damaged sheet and a second attempt.
Step-by-Step Methods for Cutting Cast Acrylic Safely
How to Cut Cast Acrylic Sheets Safely?
Cutting cast acrylic safely starts with stable support and controlled speed. Cast acrylic is rigid, but its edges can chip when the sheet vibrates. Wear safety glasses, hearing protection, and a suitable dust mask. Keep the work area ventilated. Leave the protective film on both faces when possible. Mark the cut line on the film, not directly on the plastic. Clamp the sheet gently, using scrap wood to spread pressure.
For thin sheets, score the same line several times with a sharp scoring tool. Use steady pressure, then place the score over a table edge and snap downward. Do not twist the sheet. This method is quiet and creates little dust, but it is not ideal for narrow strips or internal openings. For thicker material, use a fine-tooth blade in a jigsaw or circular saw. Support both sides of the cut, and move at a moderate, even pace. If the edge begins to melt, pause and let the blade cool. Slower is not always safer.
After cutting, inspect the edge while the film remains attached. Remove burrs with a deburring tool or fine abrasive paper. Keep your fingers away from the edge. Round sharp corners slightly to reduce handling injuries. For a cleaner finish, use finer abrasives after practicing on scrap. I once rushed this stage and created a cloudy edge from excess heat. A test cut would have prevented it. Clean chips with a soft brush, not compressed air directed toward your face.
Smoothing Edges and Inspecting the Finished Cut
After cutting cast acrylic, let the sheet cool before smoothing the edges. Heat can soften the surface and hide small defects. I use a sharp scraper to remove light burrs, holding it almost flat against the edge. Then I sand by hand with progressively finer abrasive paper. Start around 240 grit and move toward 600 grit for a clearer finish. Keep the paper backed by a flat block.
Do not press hard. Acrylic edges can develop white stress marks when overheated or forced. A damp cloth can control dust, but avoid soaking electrical tools. For a transparent edge, polishing may improve clarity, yet excessive heat can distort nearby details. I once rushed this stage and created a rounded corner that changed the final fit. The mistake was small, but the lesson was not.
Inspect the cut under bright, angled light. Look for hairline cracks, chips, cloudy areas, deep scratches, and uneven corners. Run a clean fingertip carefully along the edge, but never use force around a visible crack. Check the length, width, and squareness with a ruler and try square. Compare matching pieces together. Small differences become obvious there. If the edge feels rough, sand again instead of hiding it with polish. Examine drilled areas and corners closely, because stress often gathers there. Leave the protective film on untouched faces until inspection is complete. That simple habit has prevented many avoidable scratches.
How to Cut Cast Acrylic Sheets Safely? - Smoothing Edges and Inspecting the Finished Cut
| Stage | Recommended Practice | Typical Data or Setting | Safety and Quality Check |
|---|---|---|---|
| 1. Prepare the sheet | Keep the protective film on both sides during layout and cutting. Mark the cut line on the film. | Use a fine-tip marker, straightedge, and a cutting allowance of approximately 1–2 mm when final sizing is critical. | Confirm the sheet is flat, clean, and free from existing cracks or deep scratches. |
| 2. Support the workpiece | Place the sheet on a stable, level surface and support it close to the cut line. | Use continuous support for large sheets; unsupported overhang should be minimized to reduce vibration. | Clamp the sheet without excessive pressure. Add a clean sacrificial board when appropriate. |
| 3. Select the cutting method | Use a fine-tooth circular saw, table saw, or jigsaw for straight cuts. Use a router or fine-tooth blade for shaped cuts. | For power saws, use a sharp carbide-tipped blade designed for plastics or a fine-tooth blade with approximately 10–12 teeth per inch for suitable jigsaw work. | Do not use a dull blade. A dull or damaged blade increases heat, chipping, and edge melting. |
| 4. Set up the saw | Set the blade so only the necessary amount extends below the sheet and use a guide for straight cuts. | For a circular saw, a blade projection of about 3–6 mm below the sheet is a practical starting point; adjust according to sheet thickness and equipment. | Disconnect power before changing blades or making adjustments. Verify that guards and clamps are working. |
| 5. Make the cut | Feed the tool smoothly at a steady rate without forcing it or stopping repeatedly in the material. | Maintain a moderate, continuous feed. If the edge begins to melt, reduce heat by using a sharper blade, improving chip removal, or adjusting the feed rate. | Wear safety glasses and hearing protection. Keep hands away from the blade and use push sticks where required. |
| 6. Control heat and chips | Allow chips to clear naturally and pause if the acrylic becomes excessively hot. | Use dust extraction or low-pressure compressed air where suitable. Avoid directing high-pressure air toward the operator. | Stop if the cut line shows heavy melting, smoke, discoloration, or strong vibration. Do not use flammable coolants. |
| 7. Remove the protective film | Peel the film back slowly after cutting and before final inspection. | If adhesive remains, use a soft cloth and a cleaner confirmed to be compatible with acrylic. | Do not scrape with a metal blade or use solvents that may cause crazing or clouding. |
| 8. Deburr the edge | Remove sharp burrs with a fine file, deburring tool, or fine abrasive paper. | Use wet-or-dry abrasive paper in a progression such as 240, 400, and 600 grit for a smoother edge. | Sand in one direction first, then inspect for remaining sharp points, chips, and raised material. |
| 9. Improve edge appearance | For a clearer edge, continue with finer abrasive grades or use a suitable polishing process. | A final abrasive grade of approximately 800–1000 grit can reduce visible sanding marks before polishing. | Avoid excessive friction and heat, which can deform or stress the acrylic edge. |
| 10. Inspect the finished cut | Check dimensions, squareness, edge condition, and surface appearance under good lighting. | Measure at several points with a ruler or caliper. Compare the cut with the required dimensional tolerance for the project. | Reject or rework parts with cracks, deep chips, severe melting, cloudy stress marks, or edges that remain unsafe to touch. |
| 11. Clean and store | Remove chips with a soft cloth or suitable air extraction and store the finished piece on a clean, supported surface. | Keep parts separated with soft, non-abrasive material to prevent scratching. | Keep acrylic away from open flames, excessive heat, and incompatible chemicals. |
Related Posts
-
What Are Acrylic Sheets and What Are They Used For?
-
What Are Plexiglass Sheets Cut to Size?
-
How to Choose Cast Acrylic Sheets in 2026?
-
How to Find China Best Acrylic Panels Supplier?
-
Exploring the Versatility of Clear Plastic Sheets: 10 Innovative Applications Backed by Industry Insights
-

Top Uses of Plexiglass Sheets in Everyday Life?